Want to Create Cool Animation Videos? It's Easier Than You Think!
Do you dream of creating stunning animation videos, but feel overwhelmed by complex software and time constraints? Maybe you’re camera shy or simply lack editing experience. Well, fear not! Today, I’m going to reveal a secret: you can transform simple sentences and even paragraphs into captivating animation videos.
That’s right, you heard it correctly. No fancy equipment or editing skills needed. So, are you ready to unleash your inner animator? Let’s dive in and learn how to create your first animation video from scratch!
Step 1: Generate Your Script with Gravity Right
Before we bring our animation to life, let’s first craft the script that will guide its story. Enter Gravity Right, a powerful tool that takes the guesswork out of scriptwriting.
With Gravity Right, you can effortlessly generate unique, high-quality content tailored to your specific needs. Whether you’re crafting a compelling website copy, writing engaging blog posts, or developing a captivating video script, Gravity Right has you covered.
Now that you’ve chosen Gravity Write as your scriptwriting partner, let’s dive into the details and craft the script that will bring your animation to life. Here’s a step-by-step guide to get you started:
1. Sign Up and Choose Your Script Type:
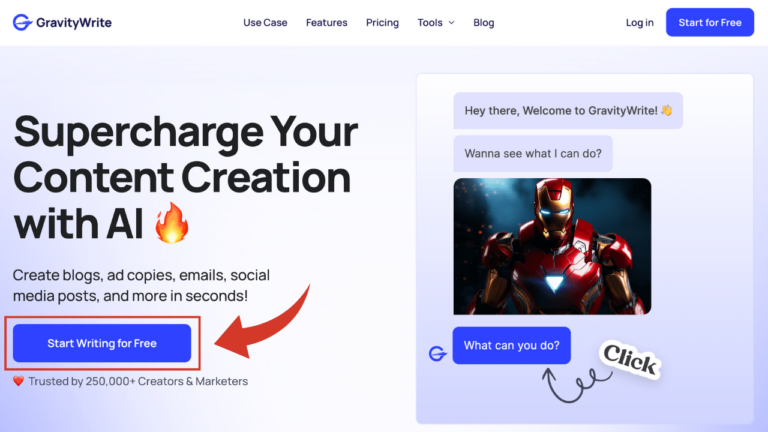
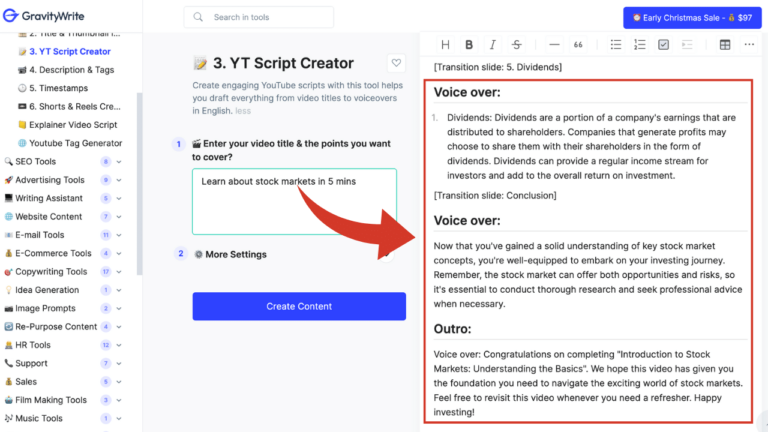
Head over to Gravity Write and create your account for free. Once you’re logged in, select “YT Script Creator” from the available options. This will prepare Gravity Right for crafting the perfect script for your animation.
2. Spark Your Creativity with a Title and Description:
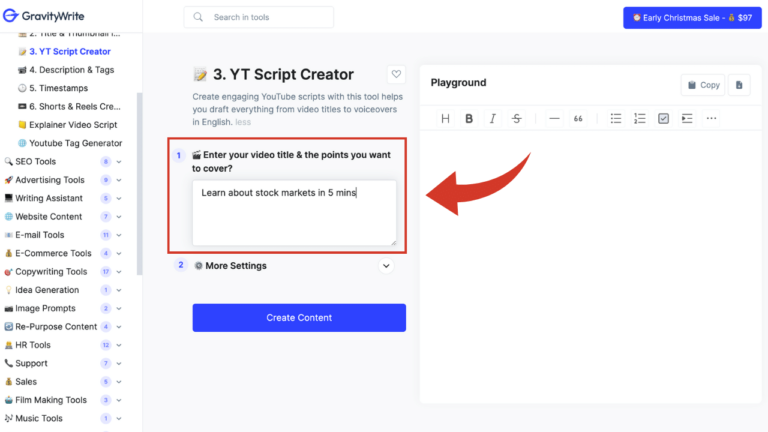
Enter your video title and points you want to cover for your animation video. This information will give Gravity Write valuable context to generate a script that aligns with your vision. Be as specific as possible, including the tone, target audience, and overall message you want to convey.
Like I will be making a video on “Learn about stock markets in 5 mins.“

3. Let Gravity Write Work Its Magic:
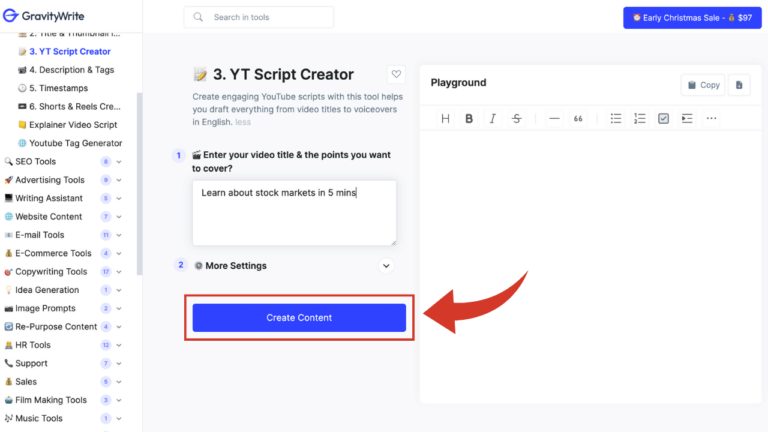
Click the “Create Content” button and watch as Gravity Write weaves its magic! Within seconds, you’ll have a well-structured, engaging script ready to guide your animation journey.
4. Review and Refine Your Masterpiece:
Gravity Write is a powerful tool, but don’t be afraid to add your personal touch! Take the time to read through the generated script, making any adjustments or edits to ensure it perfectly captures your vision.
Step 2: Bringing Your Words to Life: Turning Script into Animation with Steve AI
Now that you have your script, let’s transform it into an eye-catching animation video using the power of Steve AI. Follow these step-by-step instructions to breathe life into your story:
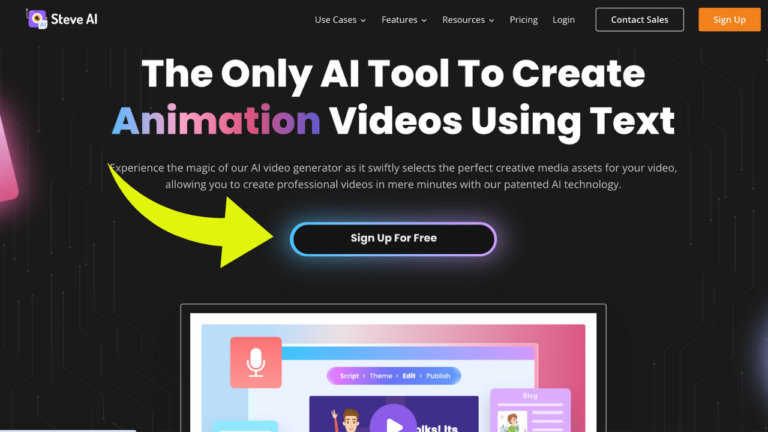
1. Head to Steve AI and Log In:
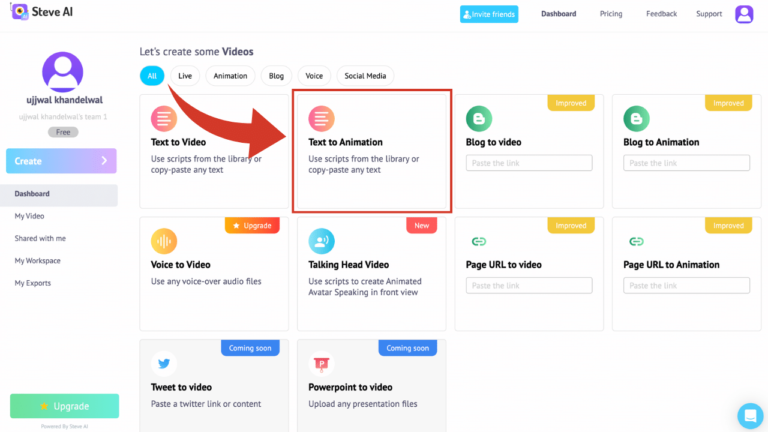
2. Choose “Text to Animation” Category:
Once you are logged in, you will see a dashboard which has multiple categories. Select the “Text to Animation” category. This tells Steve AI that you want to turn a script into an animation video.
3. Copy and Paste your script
Once you select the “Text to Animation” option, a pop-up will appear, prompting you to either “Create a sample script” or “Write your own script.” Click on “Write your own script” as we have already generated our script using “Gravity Write”.
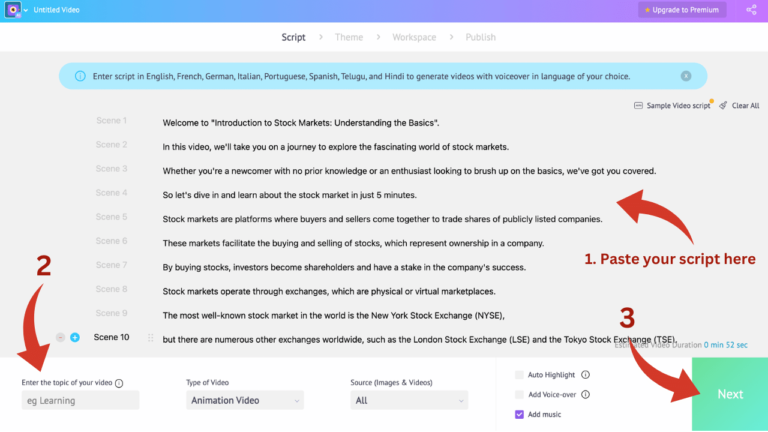
Now simply paste your script in Steve AI’s dashboard. Enter the topic of your video and hit “Next“. Your script will be converted into different scenes (which you can modify).

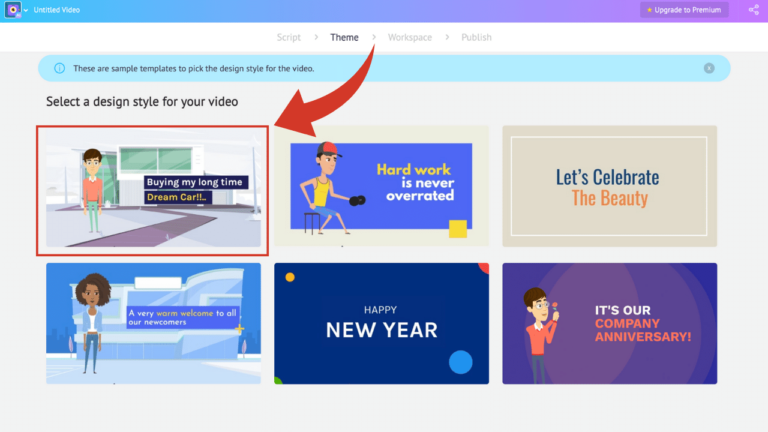
4. Pick an Animation Template:
Once you hit next, you will be asked to select a design style for your video. Explore Steve AI’s extensive library of animation templates and choose the one that best complements your script’s tone and theme. I will choose this one.
5. Customize Your Video:
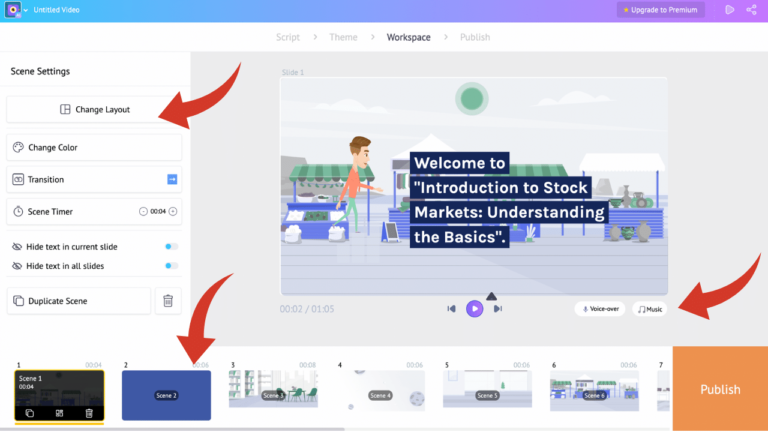
After you choose an animation template, you will be taken to your workspace. Now comes the fun part! Steve AI allows you to personalize your video in several ways:
- Character Design: Click on the current character and choose from a variety of character styles and customize their appearance.
- Music and Sound Effects: Add a soundtrack and sound effects to enhance your video’s impact.
- Voiceover: Opt for a text-to-speech voiceover or upload your own audio recording.
- Color Palette: Play with the color palette to match your brand or create a specific mood.
6. Review and Refine:
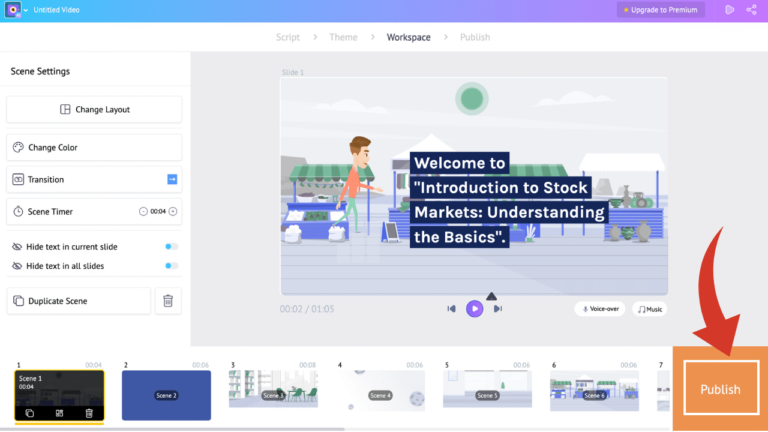
Once you’re satisfied with your customizations, hit “Publish” and watch your animation come to life!
Steve AI provides a preview feature to ensure everything looks and sounds perfect. Make any necessary adjustments before moving forward.
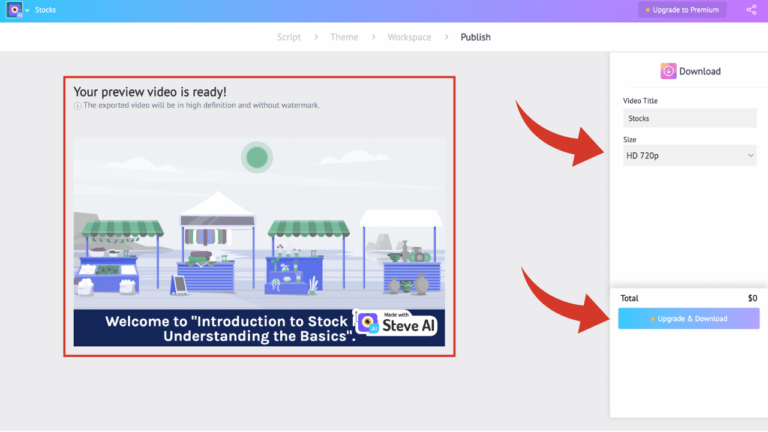
7. Export and Share Your Masterpiece:
When you’re happy with your animation, click the “Download and Upgrade” button to download your video in various formats. Share it with your audience on social media, your website, youtube, or anywhere else you’d like!
Remember, with a bit of creativity and the power of Steve AI, you can transform your text into captivating animation videos that will engage your audience and leave a lasting impression. So, unleash your inner storyteller and start animating!


